Startup
Start up your Starter Kit and configure the basics
Step 1
Connect your Starter Kit
- Connect the PLCnext Control to your computer by using the patch cable provided
- Plug in the power supply
Step 2
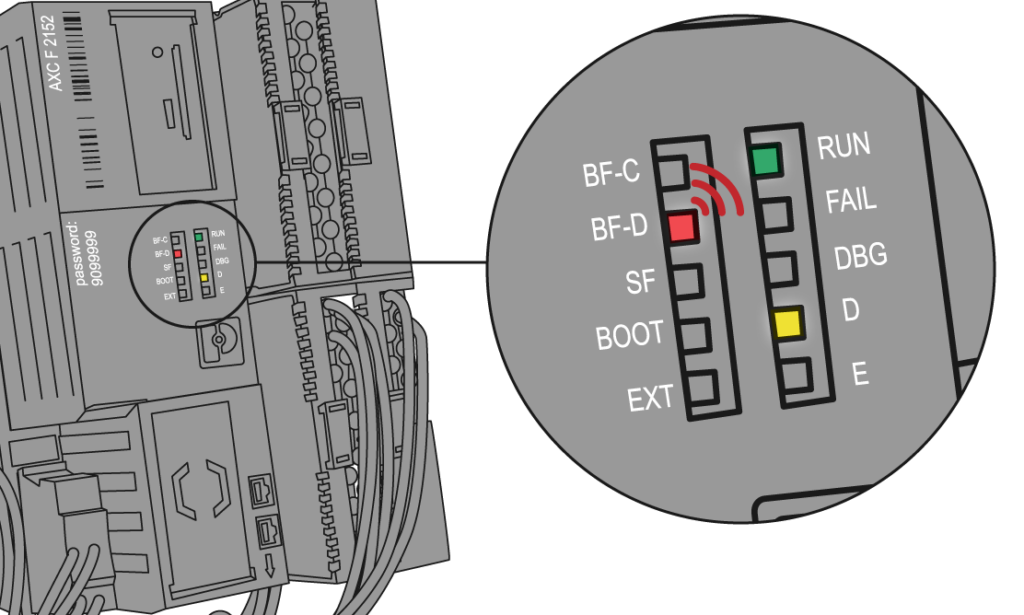
The PLCnext Control will now start up automatically. This may take a few minutes
When the controller is started up the LEDs are flashing as followed:
- RUN = lights up green
- D = lights up yellow
- BF-D = flashing red in 0.5 hz cycle
- Your PLCnext Control is now ready to operate
Step 3
Download PLCnext Engineer
Step 4
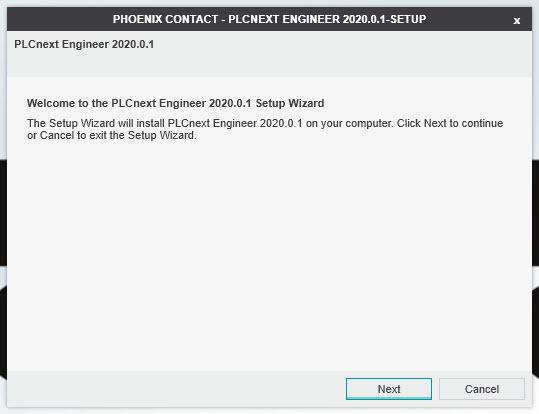
Install PLCnext Engineer
- Double-click the *exe file to start installation
- Follow the instructions in the installation wizard
At this point you have finished the startup of your PLCnext Technology starterkit. If you wish to proceed with your own automation project you can of course do so. In case you need more guidance with your first project, follow the next steps.
EXAMPLE PROJECT
Get your Starter Kit ready for your first project
Step 5
Download the Starterkit Example Project from the PLCnext Store
Step 6
Open Starterkit Example Project in PLCnext Engineer and connect to your PLCnext Control
- Double-click the [ProjectFile] to open the Example Project
- Connect to your PLCnext Control
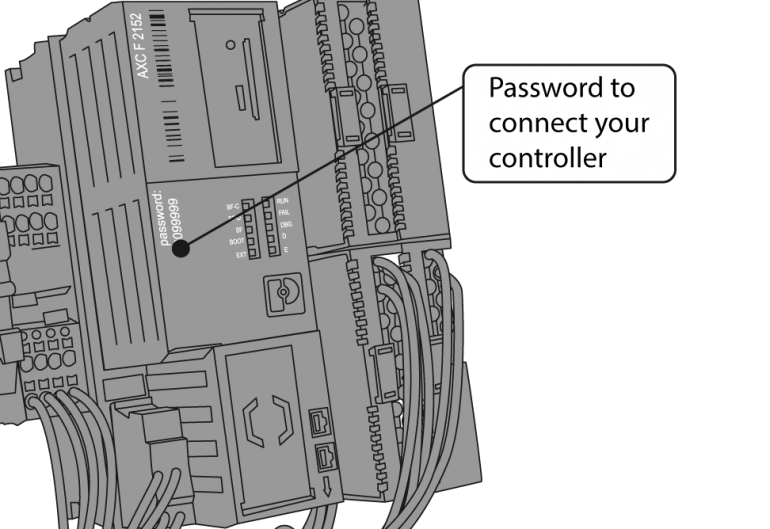
- In order to connect your controller, you need a password which you can find onto the PLCnext Control
At this point you have finished the startup of your PLCnext Technology starterkit. If you wish to proceed with your own automation project you can of course do so. In case you need more guidance with your first project, follow the next few steps.
EXAMPLE PROJECT
Step 7
Download project to your PLCnext Control
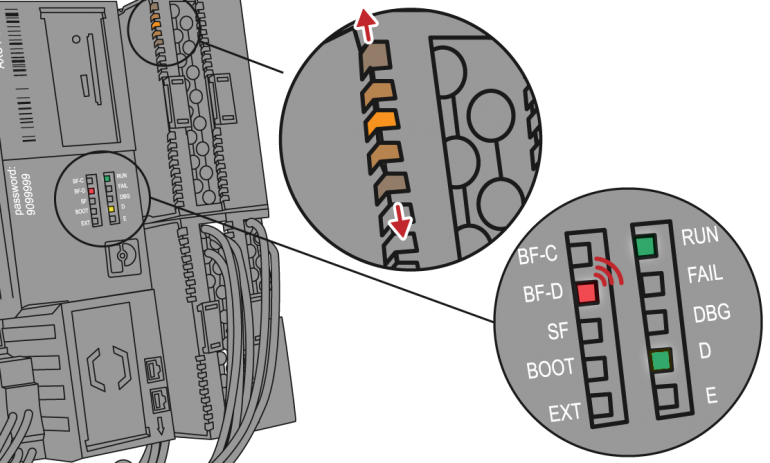
Press F5 to download project. When the project has finished being downloaded to your controller the LEDs are flashing as followed:
- RUN = lights up green
- D = lights up yellow
- BF-D = flashing red in 0.5 hz cycle
- Running lights start on AXL SE DO16 module
Step 8
Connect to WebVisu of the example project
- Open your browser and enter: 192.168.1.10/ehmi
- You can now use the switches on your starterkit board to control the coffee machine
- Switch 1: Running lights start
- Switch 2: Brewing coffee
- Switch 3: Display binary clock
- Switch 4: Let the LEDs of the AXL SE DO16 light up according to the slide position of the slider
FAQ
PLCs are simple computers that are an essential part of automation in a wide range of industries. While low-cost devices like Arduino and Raspberry Pi have a great number of capabilities, they are not able to replace PLCs in industrial applications. And additional components and man-hours needed to run and set up the Arduino as a PLC will eliminate the cost advantage. Arduino, Raspberry Pi, and similar devices are great tools in the maker movement, but PLCs have the advantage in larger and more complex situations.
The basic Engineer Software is free of charge. All standard functions for your PLCnext Technology project are already included. It is possible to add more functionalities such as Functional Safety Editor as chargeable add-ins.
You can directly go to the PLCnext Store and start your registration process. In this process we will get in touch with you – but feel free to directly contact your local sales subsidiary for more information.
You can connect your PLCnext Control to the cloud of your choice. We directly support our Proficloud, but with apps from the PLCnext Store or your own integration every cloud is possible.
You can find the PLCnext Engineer available for download on our corporate website. Just search for PLCnext Engineer and click on the download section.
Forum


