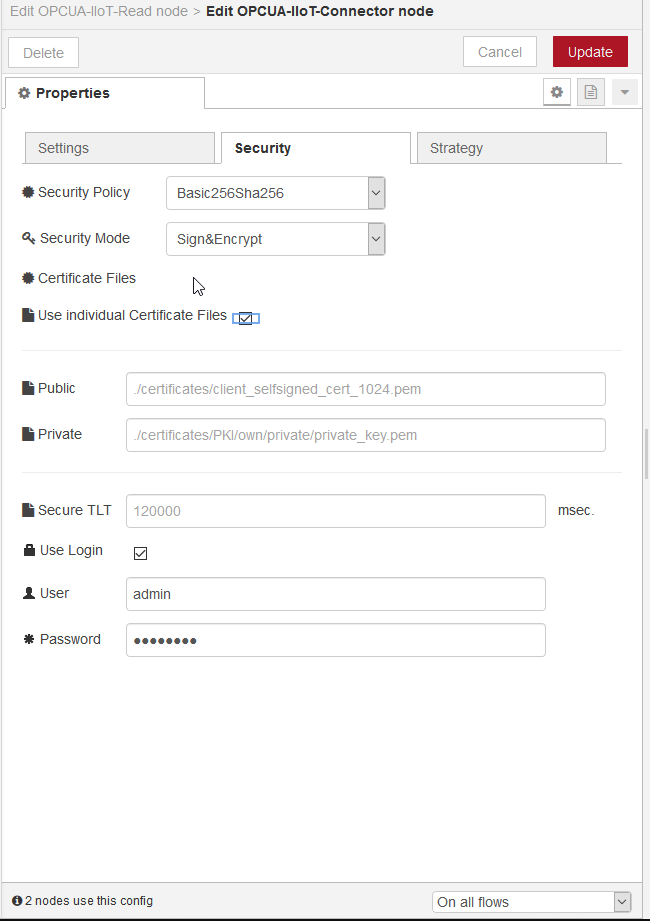
From time to time, the OPC UA module in Node-RED doesn’t always want to connect to our OPC UA server after installation.
The reason is that the installation doesn’t always create the necessary self-signed certificates which are needed.
This blog will show you how to create those certificates on the controller and how to get your OPC UA connection up and running in Node-RED.
Creation of the certificates
Sign in into the controller with your admin credentials. Once signed in, execute the following command:
openssl req -newkey rsa:1024 -nodes -keyout private_key.pem -x509 -out client_selfsigned_cert_1024.pem
This command will prompt you for some extra information like your name, company, location, … which will be used to create the certificate.
Linking the certificates
After the certificates are created, you have two options in order to use them.
Placing them in the default directory
You can use them by placing them directly in the standard location, this can be done by searching your node_modules folder.
From thereon you can place the certificate in:
../node-opcua-client/certificates
and the key in:
../node-opcua-client/certificates/PKI/own/private
Note that this last folder will already have a key file with the same name. I advice to rename the original before moving your file into this location.
Linking them from the Node-RED webpage
When you create the OPCUA-IIoT-Connector node, you can check the checkbox “use individual certificate files” and link to both files which you created in the beginning.

After a restart of Node-RED your OPC UA communication should be up and running!


Leave a Reply
You must be logged in to post a comment.