Configuration - Fan Control
Available on AXC F 3152 and RFC 4072S from firmware 2020.3, and on RFC 4072R from 2022.0 LTS
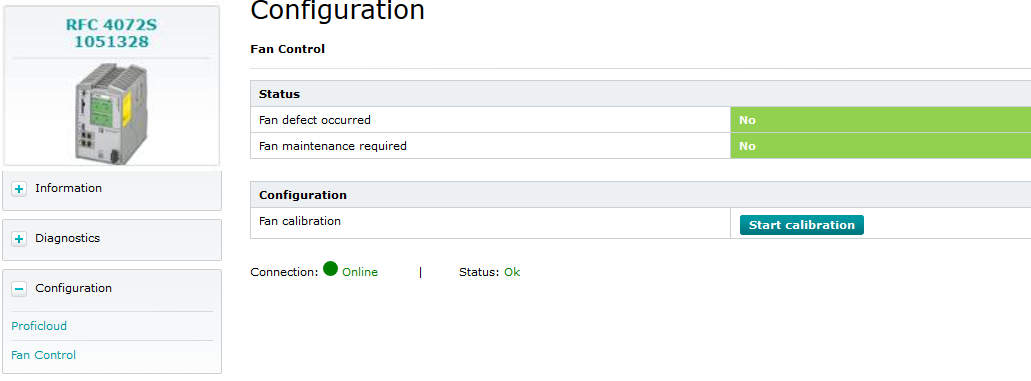
The Fan Control page provides status information on an installed fan module, and whether maintenance is required to it. The status information is cyclically updated.
Accessibility
|
This WBM page is accessible with user role:
|
How to get into the WBMHow to get into the WBM
Establishing a connection to the Web-based Management (WBM):
- Open a web browser on your computer.
- In the address field, enter the URL https://<IP-address-of-the-controller>/wbm,
for example: https://192.168.1.10/wbm.
For further information, see WBM.
Fan Control page
Note: The Fan Control page is only shown in the web-based management on controllers which support an additional fan module, such as:
- AXC F 3152 (item no. 1069208) with an AXC F 3 FAN MODULE (item no.1173450)
- RFC 4072S (item no. 1051328) with an RFC FAN MODULE (item no. 2404085)
- RFC 4072R (item no. 1136419) with an RFC FAN MODULE (item no. 2404085)

On a controller that supports a fan module but has none installed, the Fan Control item is still visible in the Configuration section of the menu on the left, but it will be grey and not clickable:

Status section
Fan defect occurred
After installation, the rotation speed of a new fan module has to be determined by conducting a fan calibration. In this procedure, thresholds for the status warnings are set for the fan module's life cycle. If any defect had occurred to the fan function or the rotation speed falls below the defined threshold the indicator in the Fan defect occurred row would turn to Yes .
Device defect due to overheating
In case a defect of the fan module is detected, immediately replace the fan module.
Find the instructions how to properly replace the fan module in the User Manual to your controller.
After replacement, make sure to open this WBM page again and calibrate the new fan module.
Fan maintenance required
After installation, the rotation speed of the fan has to be determined by conducting a fan calibration. In this procedure, thresholds for the status warnings are set for the fan module's life cycle. If the rotation speed falls below a defined threshold the maintenance indicator would turn to Yes .
In that case, you have to make sure the fan module can work properly by checking the hardware conditions:
- As soon as possible, shut down and dismount the controller, then detach the fan module
(find the instructions on how to do this in the User Manual to your PLCnext Control). - Brush the dust off the fan blade thoroughly, make sure the fan blade is spinning freely.
- Check the connector for oxidation or foreign substances on the contacts that could obstruct the passage of current and cause a lower speed.
- Remount the fan module and reinstall the PLCnext Control
(find the instructions on how to do this in the User Manual to your PLCnext Control). - Open this WBM page again.
↪ The maintenance indicator should have turned back to the No state.
Note: If the Fan maintenance required is still indicating as Yes , or returns to this state soon after a maintenance, then the fan module has to be replaced. That takes effect even if Fan defect occurred does indicate No after another maintenance. - Consider to order a new fan module for a scheduled exchange.
Configuration section
Fan calibration
After a fan module is installed initially to a PLCnext Control the fan module has to be calibrated. With this operation, the fan will be forced to repeatedly spin with its maximum speed to determine the reference values for warning thresholds.
- Start the calibration by clicking the button and wait for about a minute.
- On controllers without a touch display:
while calibrating, the sound of the speeding fan can be heard.
↪ As soon as the sound turns back to normal the calibration is done. - On controllers with a touch display:
in addition to the sound of the speeding fan, a Calibration active message box pops up in the display.
↪ As soon as the message disappears the calibration is done.
- On controllers without a touch display:
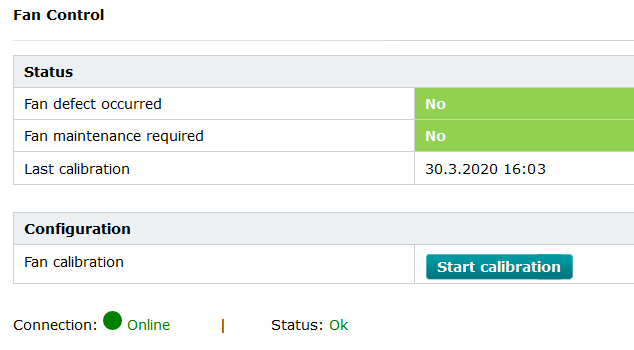
- Refresh the browser page to see a new row indicating the Last calibration time stamp in the Status section:

